In spite of being in the middle of painting new miniatures, repainting old ones, trying to tart up others without doing a complete rehash and making a new set of terrain as well as playing catch-up with painting buildings, I wanted to have a game using my new hills, cloth and what terrain I had.
 |
| Contours used |
 |
| Starting points & initial orders |
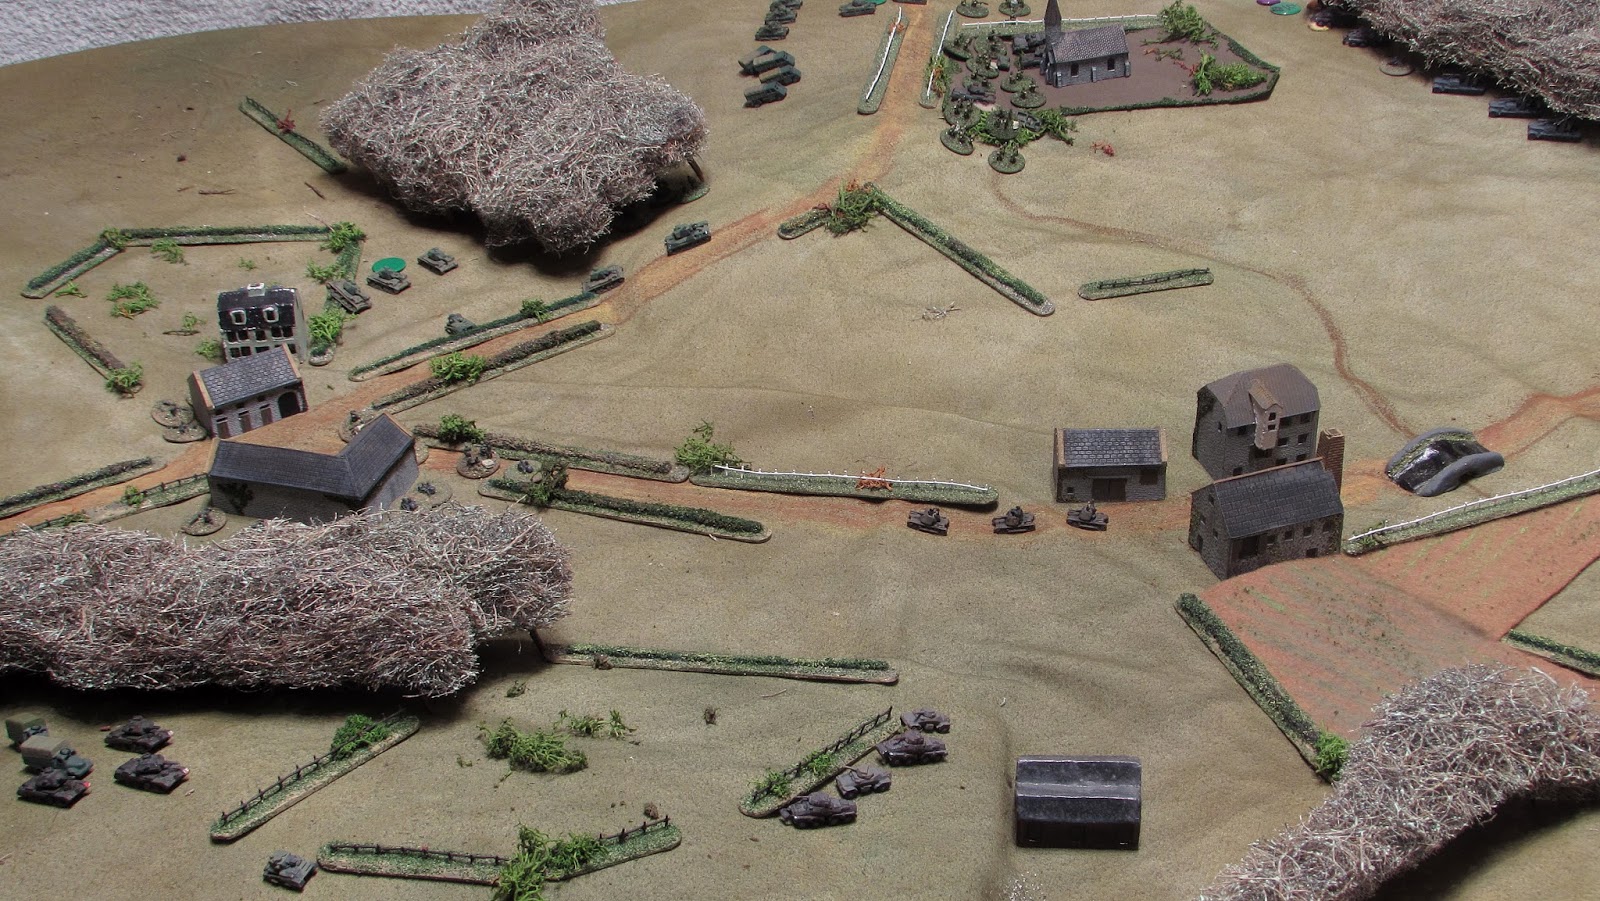
The wood canopies have not been painted & flocked yet but at least they are fairly organic coloured (if a little dried up and twiggy looking for May in France). I screwed small twigs in to keep the rubberized horsehair off the minis but they are massively oversized (if they were supposed to be actual tree trunks and you can be bothered to look that close). I'll probably use painted cocktail sticks eventually because they can be stabbed in without ripping any of the structure to bits and maybe glue them in place. I used fence sections as giving soft cover due to not having many bits of hedge. All woods were 'open'. Ground scale 1" to 100m.
The Kradschützen quickly passed through the mill area and secured the farm and soon afterwards, the 8-rads & Bunkerflak got into position on the high ground. Cruisers on each flank moved into the churchyard and onto the plateau with their infantry. German recce is spotted moving about near the mill.
(Green markers remind me that a unit has been spotted and light blue mean the unit (in this case, the Bunkerflak) is on overwatch)
 |
| Kradschützen observing Cruisers |
As the Cruisers nose through the gravestones, the Bunkerflak open up at 750m, brewing up two tanks in the space of so many minutes. I nearly always forget about using smoke but this time I had no excuse having an A9 CS in the CHQ so it was despatched to blind the 88's. On the common to the South, the A13s and armoured cars continue on their collision course.
 |
| First contacts |
As the CS tank struggles up Chapel Hill, the Kradschützen fan out into the nearby farm outbuildings, still not spotted by the oncoming Cruisers. The Bunkerflak, with no armour targets but suspecting an infantry attack, shell the churchyard to little effect.

The mixed SdKfz 232 & 222 unit has been informed of enemy movement in the direction of the small common. PanzerJagers trundle through the mill works.

There is a fierce exchange of fire between the 8-rads (hoping for a lucky shot) and the last A13 sheltering from the 88's behind the chapel who, one by one, picks the armoured cars off.
(The tree canopy was moved back a bit to make measuring easier here and the purple marker denotes 'shaken' morale status. The green marker has the unit morale score written on it when required)

The CS tank inexorably crawls up Chapel Hill. The assault on Hill Wood must wait for smoke to be laid. Kradschützen sneak into the farmhouse. Infantry in the churchyard begin to cross the open ground, unnoticed at that distance.

The battle of wits begins on the small common and the PanzerJagers continue down the lane, the Cruiser CHQ tanks as yet unobserved.
The 8-rads in the wood finally notice the enemy infantry heading their way but the last survivor is shot up by the Matildas, who then wheel to take on the Bunkerflak 88's.

The CS tank makes it to cover but the slower A10 is still grinding up Chapel Hill when the tank destroyers finally notice and swing around for snatched shots. With two misses and one hit, the Sqn CO is saved by 2mm of armour. Unbeknownst to the A10s, the German infantry is moving around to their rear in the hedgerows.

Back in the field, the 222s try to get the Cruisers to 'come on' but a 'hull-down' slogging match begins.

The A9 CS begins laying smoke on the treeline. Luckily for the Brits, the wind from the South East, is perfect. The last A13 pops smoke too in case it helps protect the Matilda Is as they clank past. The A10s line up on the SP guns who have done for their CO before he could get hull down and the MkVI switches flanks and triggers the infantry ambush.

Infantry lurks in the dead ground to the South as AP zings over the crest of the small common. The 2nd troop of Matilda Is at left rumble inexorably on towards the farm. Being crucial to the assault on Hill Wood, the Colonel steps up to bolster the morale of the CS tank.
 |
| Overview so far |
Outgunned, the German armoured cars throw smoke and bug out.

The Czech guns on the tank destroyers turn their barrels toward the A10s who spot and kill an encroaching anti-tank rifle team.

The Bunkerflaks give up Hill Wood and try to change position.

The lone Cruiser in the churchyard takes careful aim on the receding 88 SP guns.

In the mad scramble to back away from the grenades of the Kradschützen, an A10 misses with both machine guns but his comrade rolls 3% against one of the SP guns.

The CS tank up on the hill tries to blind the PanzerJagers with smoke but here the wind direction is not as favourable. The Mk2 Cruiser down the lane is too slow in reverse and over hedgerows to escape even the very first grenade thrown.

In this case revenge is a dish served hot!

Looking a bit untenable for the Germans on this flank.

Matildas heading for the remaining PanzerJagers...

The Bunkerflaks were going to take up positions (if they had time, which is doubtful) in the treeline at the back of this picture but would have probably ended up smoked up again by the CS tank. Matilda IIs & A13s were closing in on the PanzerJagers & armoured cars. Eventually the Kradschützen would have probably been isolated in the farm but finally cleared out.
 |
| West to East |
 |
| South to North |
I expected it to be quite an unbalanced game but when I added the Bunkerflaks I assumed they would wreak carnage but when it came down to it there weren't that many long sight lines. Possibly they would have been better where they were ultimately headed for.
I suppose the Matilda Is did what it says on the tin: plod on at walking pace. However this meant they never fired a shot as they didn't even get close to the thick of it. Hard to imagine how they could be used to any great effect.
First time I thought to fire smoke; was rather useful, will do again!
The cloth washed well; the oil based pastels (roads, stream) came right off in a cold wash and the various spray coats of paint stayed on! No rule tweaks to speak of.
Game time: 6 hours
No comments:
Post a Comment
Feedback welcome!