Somewhere in the British sector, there's a ridge with commanding views over a village. It is on a key route for the 7th Panzer Division's advance to the coast, whose most advanced units have pushed several kilometers before their infantry. All that can be spared by the Allies is part of a cruiser squadron but luckily, the attrition on the Panzers has naturally been severe of late and they are also under strength.
Two of my wargaming storage cabinets on wheels were pushed together to form a 4' x 3' playing area, then shaped Celotex foam hill forms from my large collection swapped around until I had the desired rolling landscape. I wanted the units to use low lying dips in the land to prevent spotting by enemies for a change, rather than the more common reliance on reduced visibility provided by interposed terrain details such as hedges.
A gaming cloth was tossed over and fabric 'cobbled roads' spray-mounted down (don't use the temporary sort; it never dries! Permanent spray mount goes dry, breaks down easily after a time and the glued down items can be harmlessly pulled off).
Then it was populated with the village of La Fourchette itself (named as usual to differentiate between games, on this occasion after the number of objectives that were eventually designated), a few farmsteads, forests then fields. Details like fences (no tactical effect, strictly eye candy), hedges (all of the twiggy non-solid variety offering only a modicum of concealment) & a smattering of scatter was sown to accentuate the valley dips. Forests as usual I will dice for upon encounter to determine vehicular penetrability, to simulate real-world discovery of such information.
British
'Medium' Cruiser Squadron
- 3x A13 mk II
- 3x A13 mk I
- 3x A9
- CHQ: A13 mkII, A9 CS, 3x MkVIB light tanks
'Heavy' Cruiser Squadron
- 3x A13 mk II
- 3x A13 mk I
- 3x A10
- CHQ: A13 mkII, A9 CS, 3x MkVIB light tanks
HQ
- A13 mkII, A9 CS, 3x MkVIB light tanks
German
4382 Kompanie
- 4x Pz IVD
- 5x Pz 38(t)
- 5 Pz II
- KHQ: Pz IVD, klPzBefWg I, Pz 38(t), Pz II
432 Kompanie
- 4x Pz IVD
- 5x Pz IIIE
- 5 Pz II
- KHQ: Pz IVD, klPzBefWg I, Pz IIE, Pz II
HQ
- Pz IVD, klPzBefWg I, Pz IIIE, PzII
As you can see, I don't have my units all that accurate nor up to full numerical strength for two reasons:
- Hypothetical units could be representing mixed bags of cobbled together remnants instead of a game-sized combat zone only containing one unit with one tank type (more variation)
- I don't want my games overrun with Pz Is and MkVI light tanks!
For easier identification, I give German armour units a sensible numerical monicker, so as you can see 4382 Kompanie contains a mix of Pz IVs, 38(t)s & IIs. Likewise, for example 4351 of the 6th Panzer Division has IVs, 35(t)s & Is and 3502 Kompanie is a 'what if' unit containing among others, Pz IIIEs with the 50mm L/42 gun.

A major objective was placed in the village and three minor ones on the high ground, with an idea that the three minor ones would be equal in victory condition value to the major one. Dicing for the jump off points for the two belligerents produced a balance, in that it seemed likely that the Germans would secure the village while the British should capture all the minor points. The test would come as to who could dislodge the other and at what cost.
The tide of British armour rises up the back of the ridge in elongated groups while the Panzers surge up a valley in two broad columns. (Having decided upon a British flanking manoeuvre, I dithered as to what the German CO might do and on the spur of the moment rolled a 1 for daring (poor) and plumped for concentration. If it were 7-9 I would then have rolled for 'prong direction' so as not be swayed by the British plan). [All miniatures Heroics & Ros]
I placed the slow A10s in the centre to easily gain what I though would be a good vantage point and the wait did, eventually pay off. Troops of MkVI light tanks from both HQ & CHQ were attached to the Western flanking group. [CS tanks just have cut-down slightly stumpier barrels.]
Rather than risk skylining on the crest road, "Flankforce" passes below the ridge. [Walled farm with slate roof by Battlescale Miniatures; not sure about the other one, it was a gift]. Brown tiddlywinks are objective markers.
To the SouthEast of La Fourchette, an ominous wolfpack of steel death sweeps majestically over the fields...kind of.
On the East flank and as per orders, the two troops of A13s stay low behind a dreadfully exposed heath. Just as well with that lot coming!
The Flankforce light tank column hurtles around the back of a Birch forest...
...and their counterparts on the far side radio in their enemy observations (white tiddlywink). [Fields with broad crop rows are from Hotz in case you're interested; others are my own making].
The A13 mkIIs now ensconced in Lower Lane and A10s on the ridge report enemy movement and go on alert (it's like overwatch). Upon this first contact of sorts, I began using the 'unit/element moving fast' markers (buff coloured cotton wool) because obviously flooring it in any vehicle (or running on foot or galloping on a horse) is going to have an effect on spotting, being spotted and firing accuracy.
[Those cottages with courtyards are old lead buildings from the late 1970s and are a bit underscale, so I put them on scenic bases to make them look bigger. They're more than adequate to be honest. Bigger looking buildings are Leven Miniatures].
Here's the German force with 'moving fast' markers; a marker at the back means the whole unit is moving over half speed, which is the threshold I use for certain tactical adjustments. And yes there are a few Pz IV Es & F1s in costume.
The MkVIs of Flankforce take advantage of the safe dip in ground and power on at 330m per move.
Not so at Russki Farm (probably named after a veteran who settled here after WW1) where the light tanks are altogether more cagey.
Opening shots: lucky hits by the A10s & A13s which bounce at this range and so have little effect on tanks (white smoke). I'm dabbling with increasing levels of subsequent suppression ultimately causing bale-outs.
"Willi! Schnell!" Barks the German CO when he realises the Tommies have got their range. But they brew up, in the open, for all to see. This will have morale consequences later on, natürlich!
Pz 38(t)s use their higher speed to rapidly cross the valley floor.
By turn 6, the Germans have captured the major objective and the British have all the minor ones. "Alright, we'll call it a draw!"
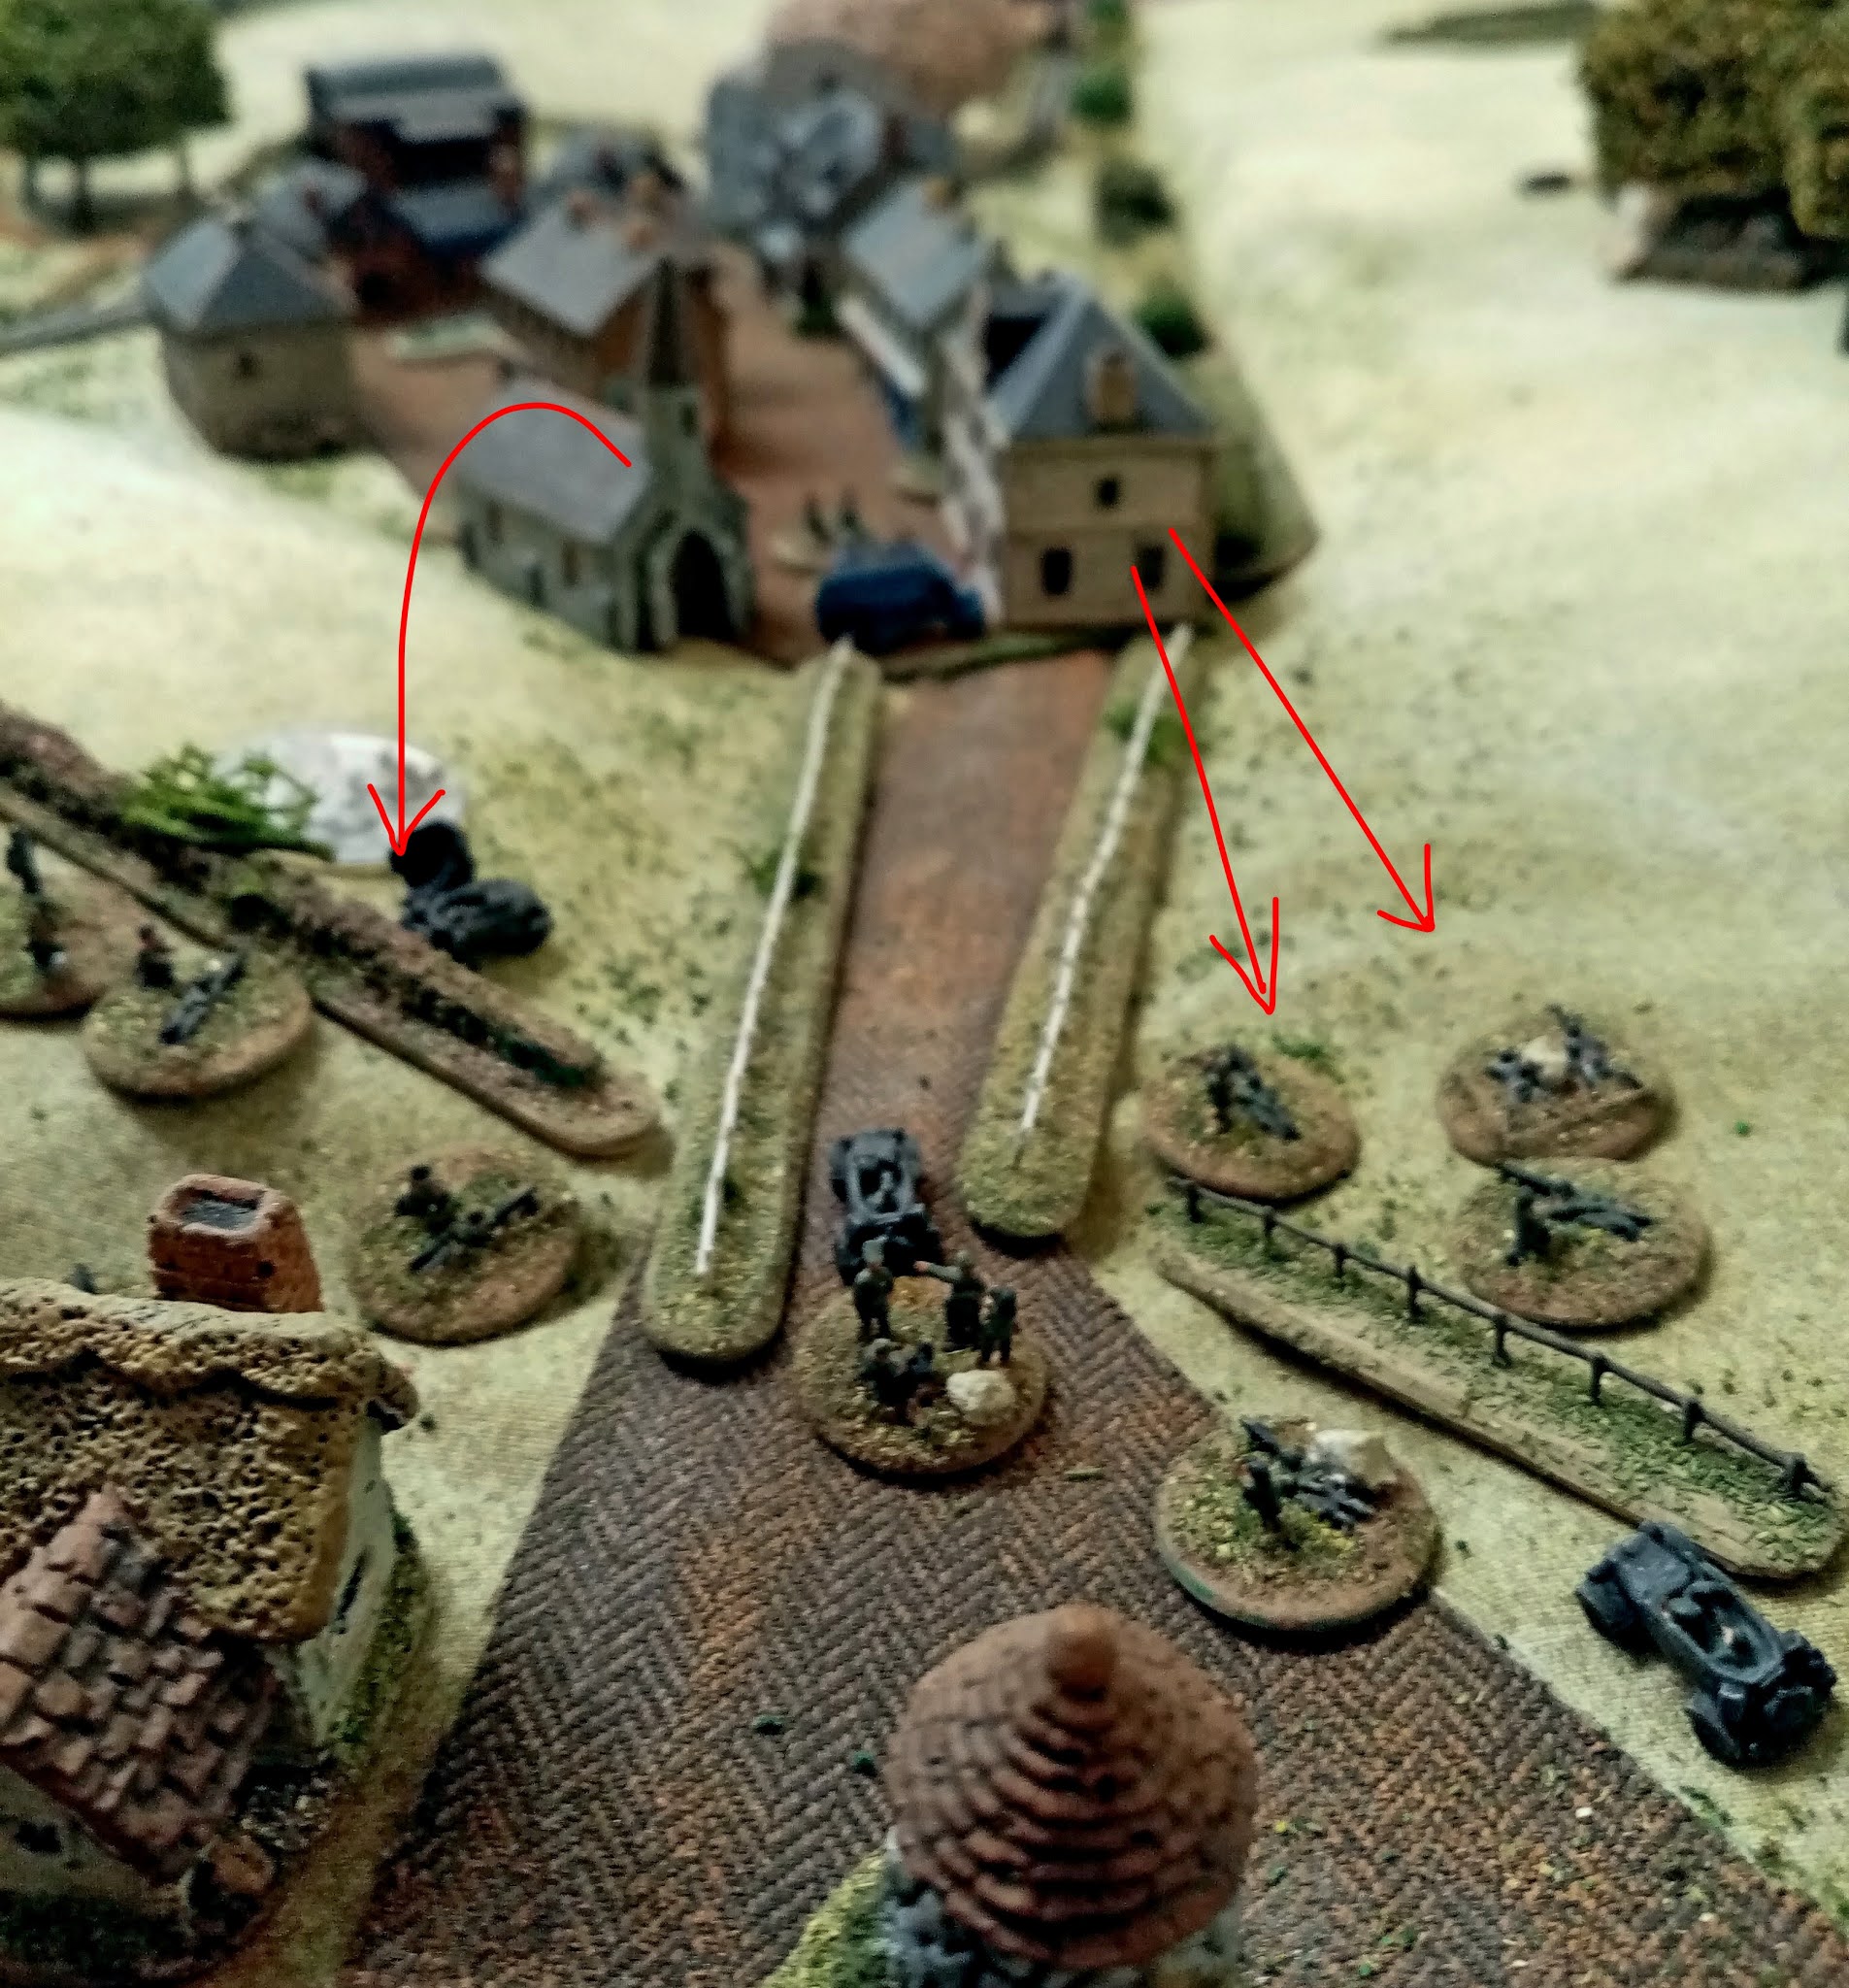
Knowing the Panzers will emerge at any moment, the Cruisers go on alert. (I'm using an FAO group to represent the Pz II crew member(s) on a personal recce around the corner of the square house. This saves exposing the tank to AP fire, a bit like what would have happened in real life, I suspect).
Rather than make a frontal charge across the open and not knowing what enemy are in the farm, the Czech built tanks begin their move from hedge to hedge.
The MkVIs of 'Flankforce' slow to allow the A13s to catch up before rounding the spur, where (potentially) the balloon might go up.
In the centre, it's all kicked off. The Cruisers miss all except one Pz III but the Germans destroy two A9s (including the troop CO) and bounce one off a MkIV Cruiser.
One of their number goes on lookout atop the rise, gives the all-clear and the rest of Flankforce drive on.
Smoke rounds from the CS tanks and their own dischargers allow the A13s & A9 in the lower road to fall back to a better position
Well outnumbered and losing one A13 in the farm, the British left flank also pops smoke and makes a fighting withdrawal. The 38(t)s are ordered to make a flanking move using the low ground...
...but out of their light tank and peering through the hedge, the German gamble is spotted.
Not so, the valiant tanks of the Flankforce right hook.
The 'heavies' of 432 Kompanie know there are enemy in concealment on the high ground and edge out to begin rapid HE fire at likely spots.
At Russki Farm, the Cruisers are praying that they will be able to parry the Pz 38(t) attack with enough time to deal with the German main force. Thank God tanks move half speed uphill!
The first Panzer to appear is one-shotted, (making the others uneasy and halt (crucifix marker)), which allows the other Cruisers to move at top speed into position.
The Pz IVs are handed a good drubbing by the 2pdr so-called 'pop guns'. (I also realised that if an activated unit has a CS tank among its compliment, a smoke round can be dropped among the enemy after the 2pdr shots to add confusion and impede retaliation).
The CO of 'Heavy' Cruiser Squadron has to move up to keep Flankforce within detachment range.
Fire & counterfire attrition between Cruisers & Pz IIIs.
Although they have taken a turn to rally, the harassed Pz 38(t)s lose their CO to the encroaching Cruisers. With the upper hand, the A13 mkIIs can be spared to cross swords with the Pz IVs.
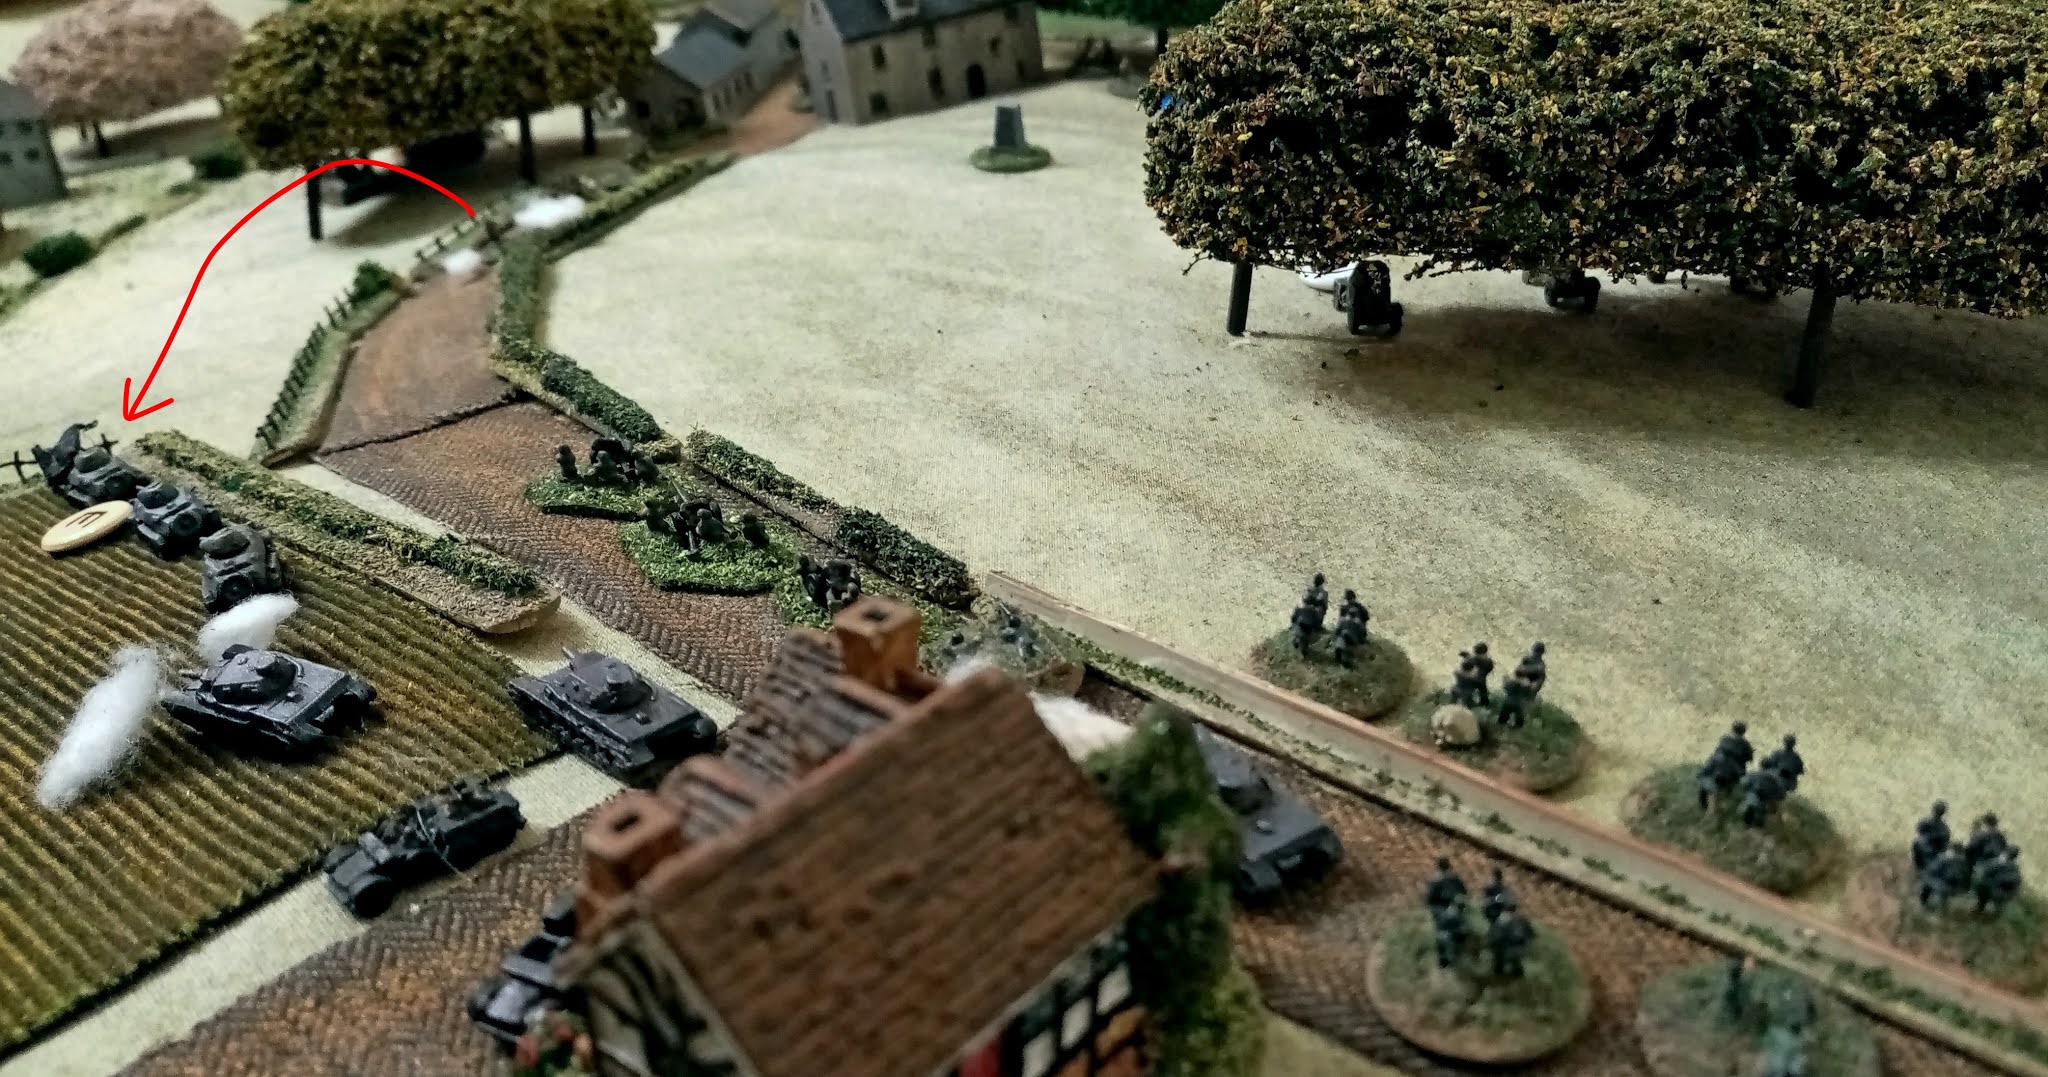
Crewmembers of two MkVIs are on lookout while the rest of the flanking forces inserts itself into the wood...not silently, obviously but unnoticed with the nearby sounds of battle.
The Cruisers in Russki Farm fire and immediately fall back. One miss, one KO. The hurried 75mm return fire sails high.
Under cover of smoke, the A10s and their CO troop move in. The other Cruisers chip away at any worthwhile victim; the as yet unmolested Pz IIs mill about helplessly, frustrated by the smoke and a lack of viable targets for their 20mm autocannons.
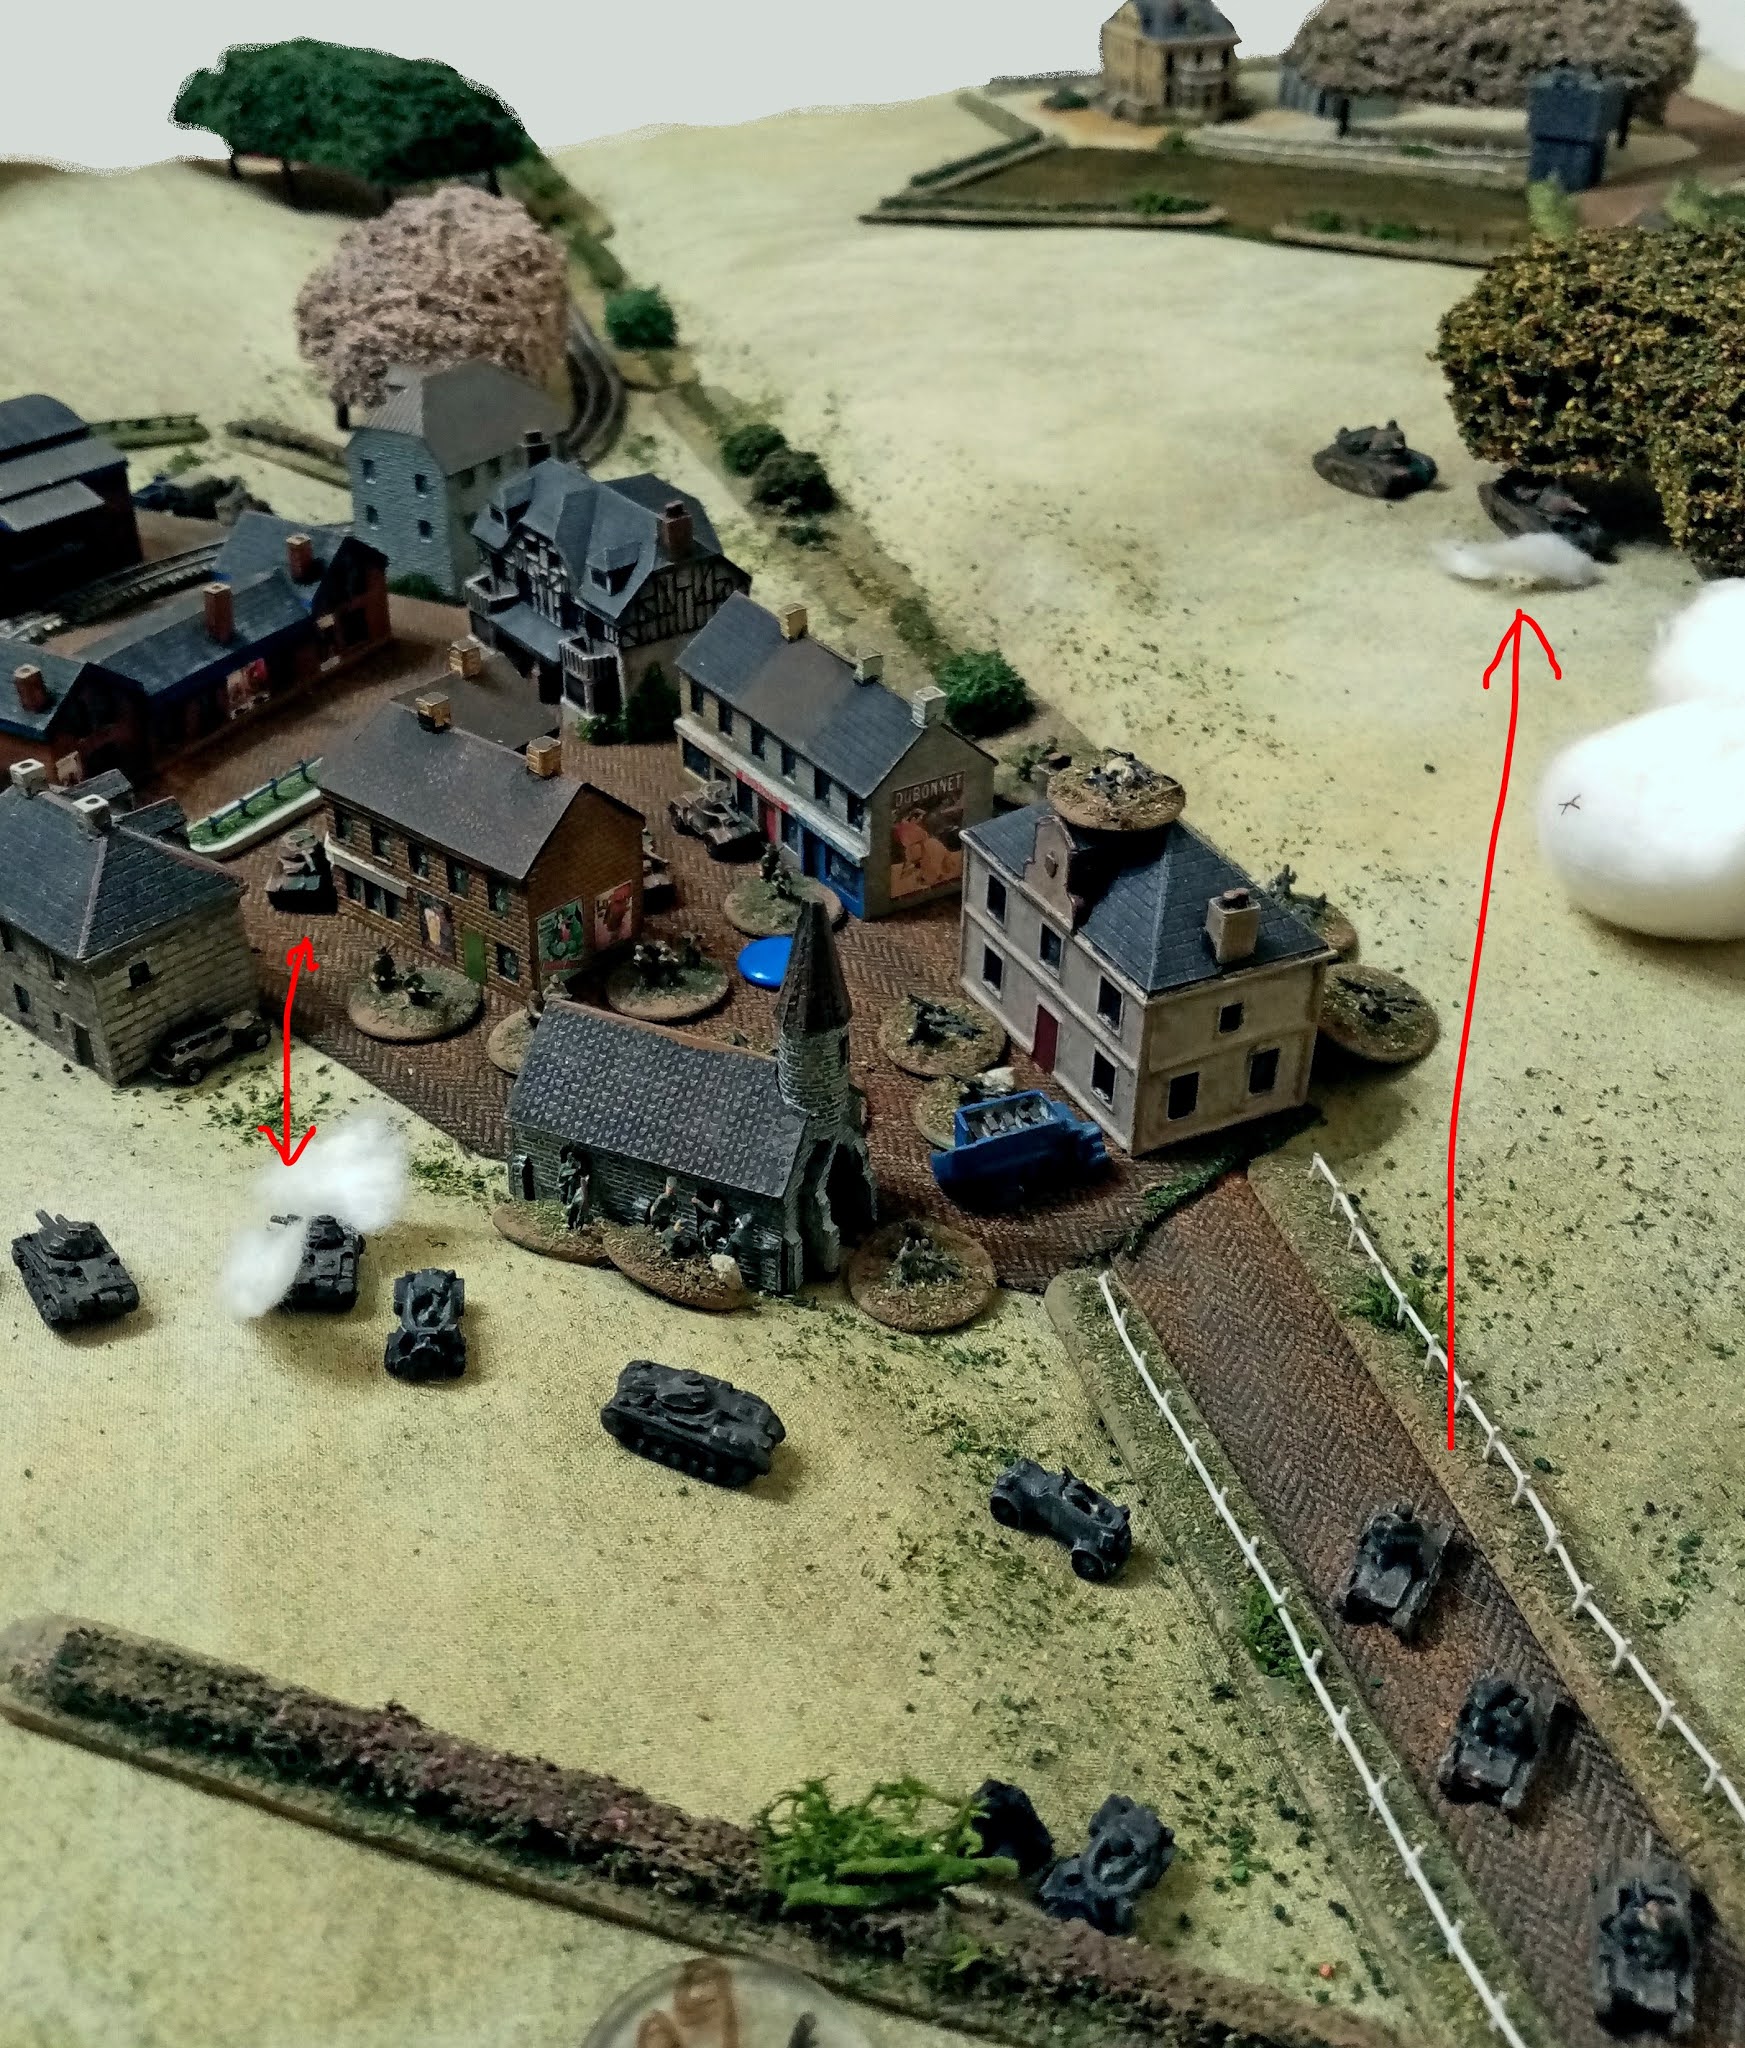
"Game over, man! Game over!" I pull the plug after Flankforce successfully springs its trap, catching the PzIIs, solitary Pz IV of the 432s and the field-promoted CO with their lederhosen down. Basically the Germans had little left in La Fourchette that would make a difference...
...and to the East, the Pz IVs of 4382, while in the thrall of the A13 mkIIs to the front, begin to be flanked by the A13 mkIs.
Lessons learnt
- move in hollows at all times, even if another unit has crossed the open ground unscathed; enemy may have moved into an overlook position
- take as much ground as wide as possible; gives room to manoeuvre and enables crossing arcs of fire
- A9s can't trade blows with anything much better than a Pz II! These and A13 mkIs need to be 2nd in the line
- personal recces for AFVs; better someone goes forward for a look than risk the tank being spotted
- make sure someone is watching the flanks!
.jpg)